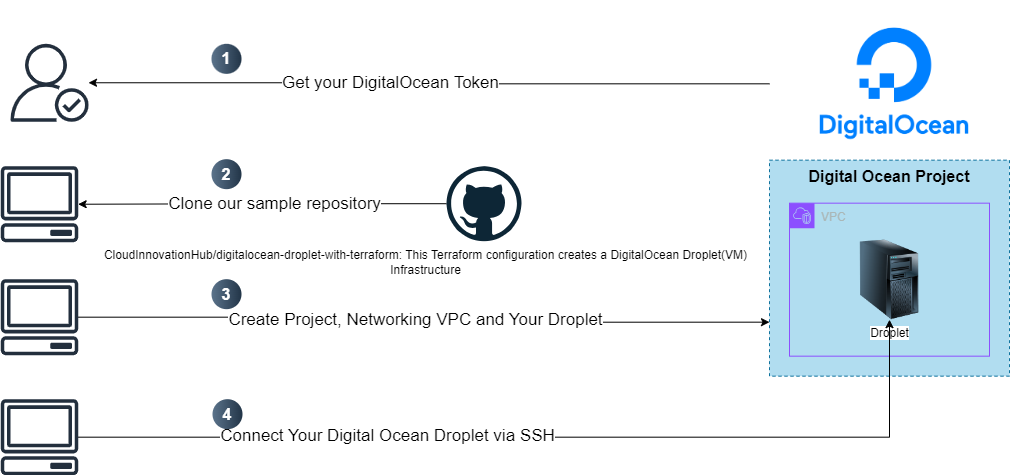
Create your DigitalOcean Droplet with Terraform
Terraform is a powerful Infrastructure as Code (IaC) tool that allows you to create and manage cloud resources declaratively. In this guide, we’ll walk through the process of creating a DigitalOcean Droplet using Terraform.
The sample repository is already on Github
Prerequisites
Before we begin, make sure you have:
- Terraform installed on your machine
- A DigitalOcean account, if you dont have an account then start here with 200$ Credit https://cloudinnovationhub.io/200DollarCredit
- A DigitalOcean API token
- SSH key pair generated on your local machine
Step 1: Generate DigitalOcean API Token
- Log in to your DigitalOcean account
- Navigate to API > Generate New Token
- Create a token with read and write permissions
- Copy and save the token securely in your Vault
- Then Export your token in CLI environment, do not push your DigitalOcean API token to Git Repositories!!
export TF_VAR_do_token="your-do-token"Step 2: Initialize and Apply Terraform Configuration
First clone the Github repository and look at variables, in each environment we are creating a simple Ubuntu Linux machine
git clone https://github.com/CloudInnovationHub/digitalocean-droplet-with-terraform.gitYou can change the project name, application name and machine size from Environment Variables.
- Initialize Terraform:
terraform init- Create necessary workspaces:
# Create different workspaces for each environment
terraform workspace new dev
terraform workspace new staging
terraform workspace new prod

# Select workspace, initially we are selecting Dev workspace
terraform workspace select dev- Review the planned changes for Dev:
terraform plan \
  -var-file="environments/globals.tfvars" \
-var-file="environments/dev/terraform.tfvars"- Apply the configuration for Dev:
terraform apply \
  -var-file="environments/globals.tfvars" \
  -var-file="environments/dev/terraform.tfvars"
After applying terraform configuration it will create a project, droplet, vpc and upload to ssh key
Step 3: Accessing Your Droplet
Once Terraform completes the deployment, you can access your Droplet using SSH:
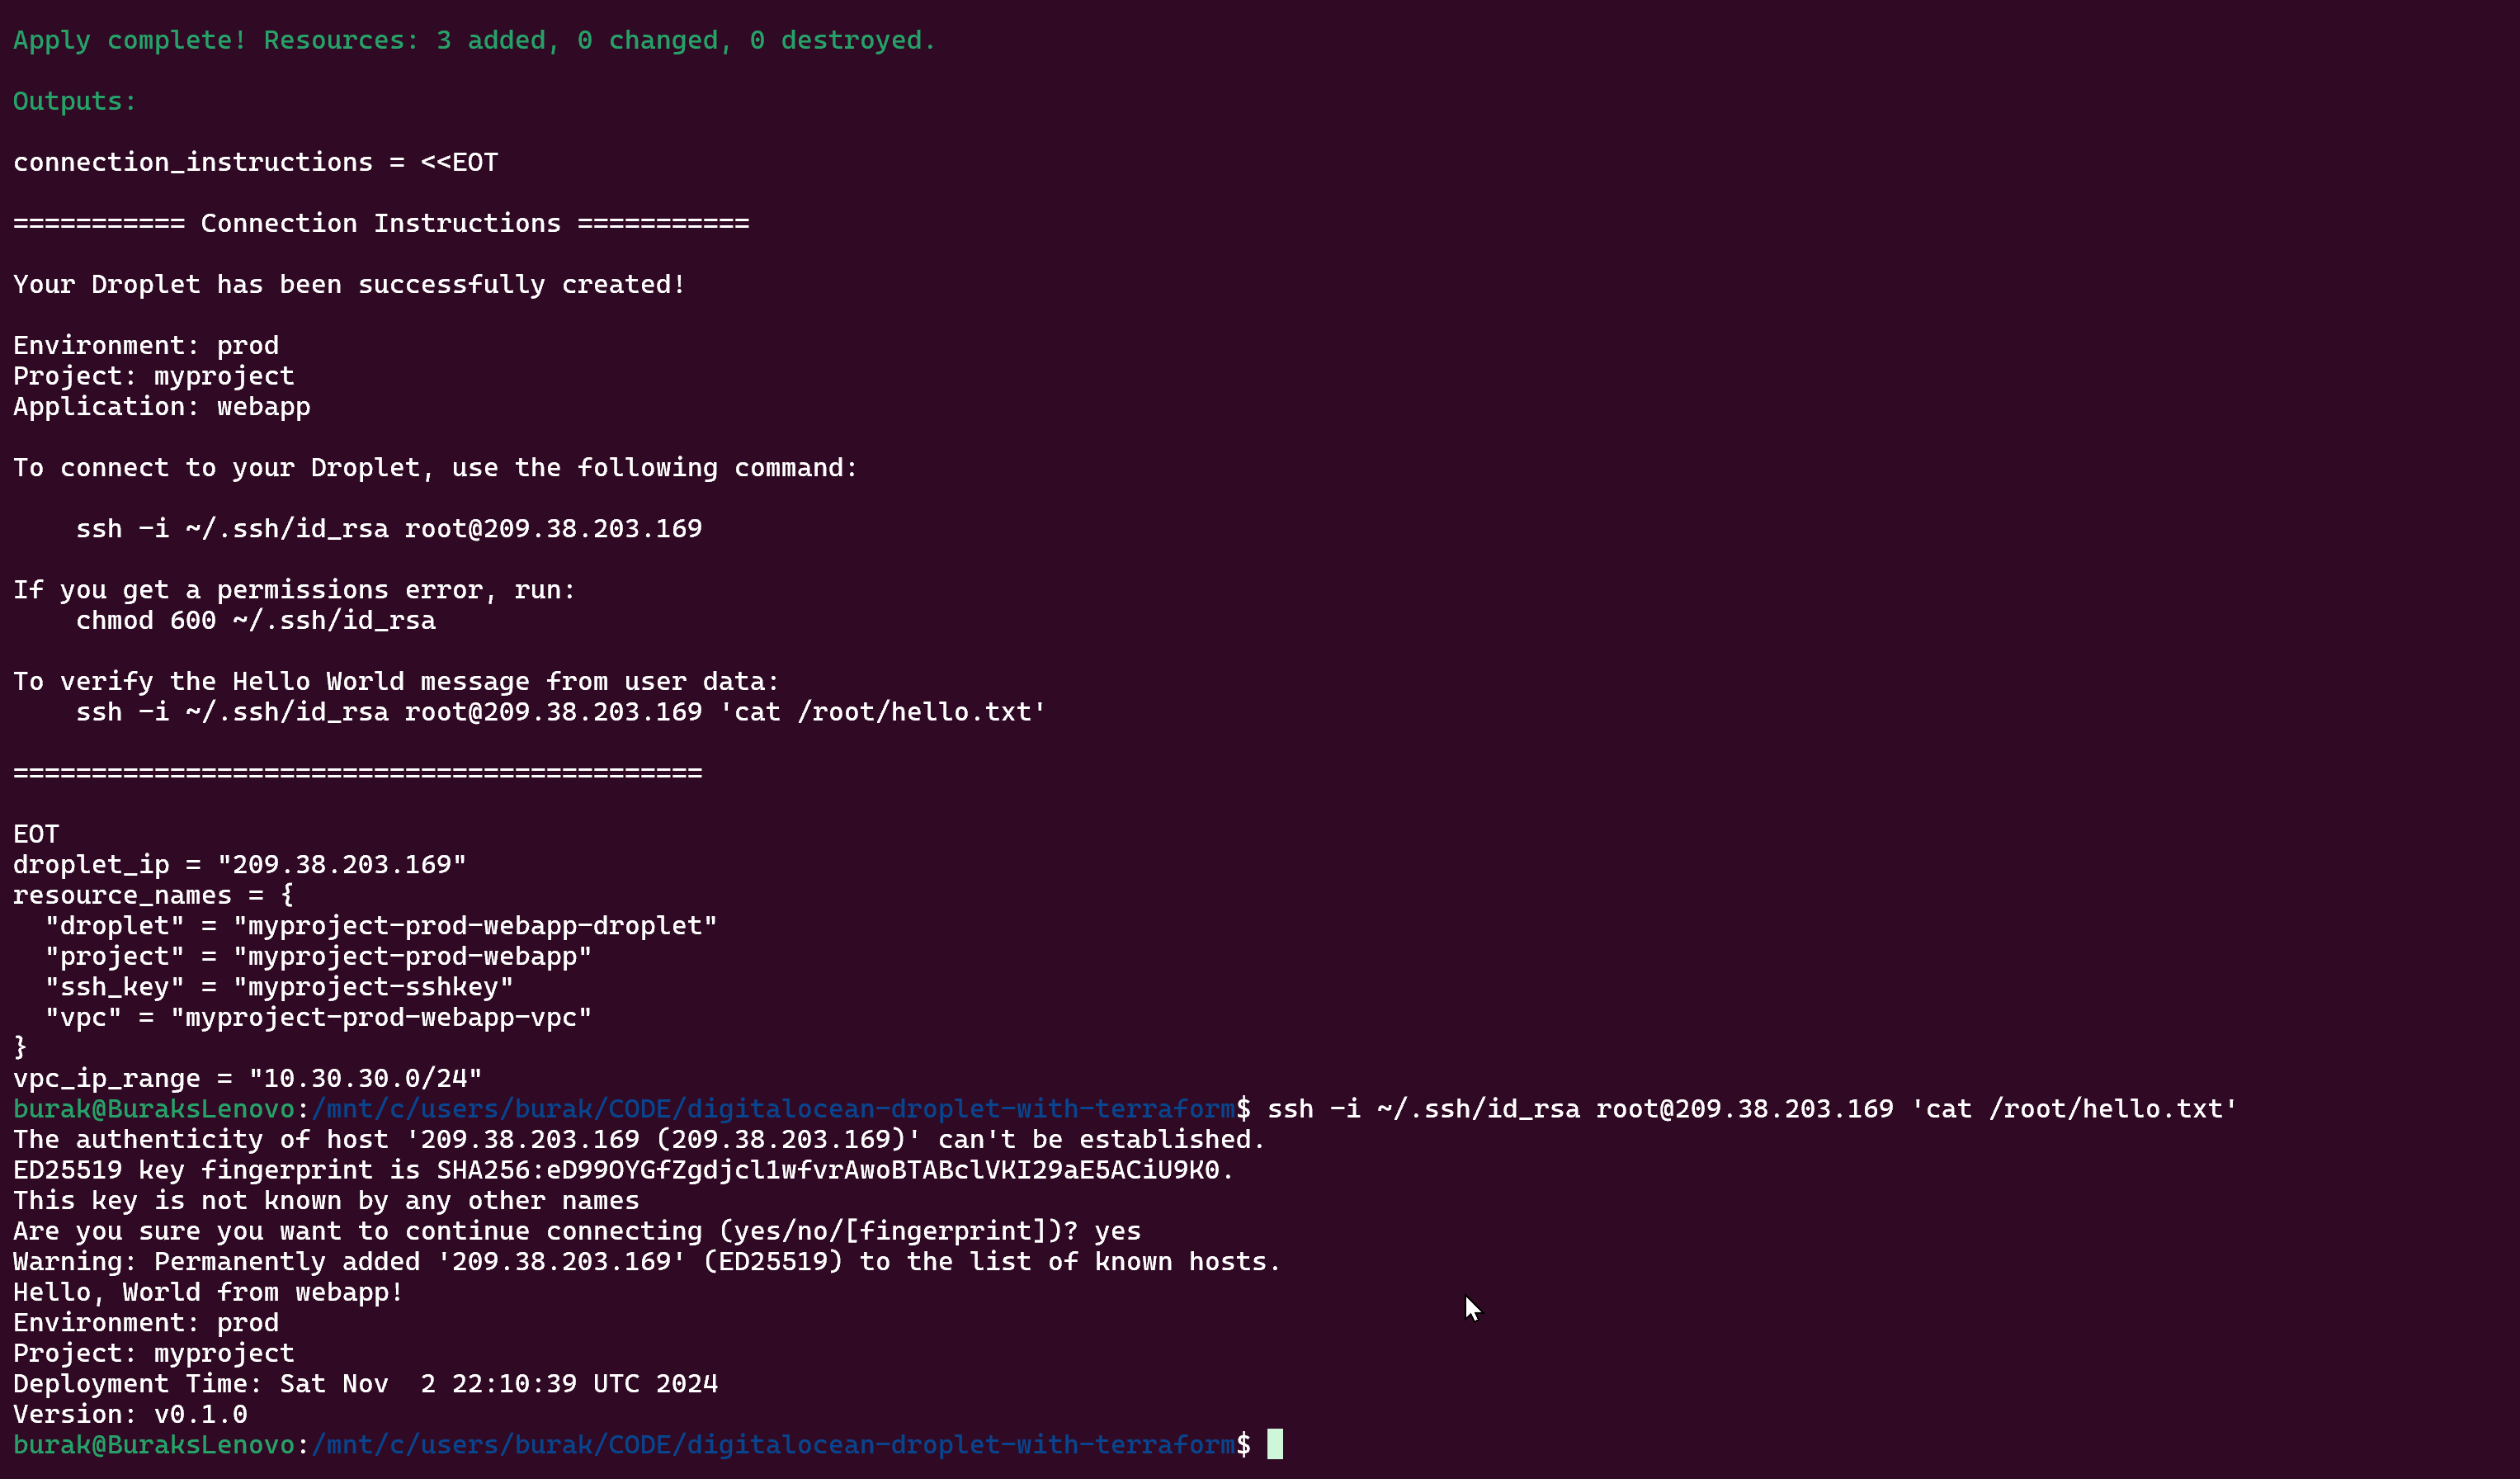
ssh -i ~/.ssh/id_rsa root@Your_Droplet_IPAt the end of each terraform apply execution , it will output and echo DigitalOcean Droplet IP and how to connect via SSH like this;
Managing Your Droplet
To make changes to your Droplet, modify the Terraform configuration and run terraform apply again. To destroy the Droplet, use:
terraform workspace select dev
terraform destroy
Best Practices
- Always use version control for your Terraform configurations
- Use variables for reusable values
- Tag your resources for better organization
- Use Terraform workspaces for managing multiple environments
- Limit networking and add firewall
- Choose logical regions as droplet locations (closer to you or closer to your customers)
- Start small, go bigger when and if it is needed
Common Issues and Troubleshooting
- API Token Issues: Ensure your token has both read and write permissions
- SSH Key Problems: Verify the path to your SSH key is correct
- Region Availability: Some regions might not have all droplet sizes available
- Rate Limiting: DigitalOcean has API rate limits that might affect large deployments
Conclusion
Using Terraform to manage DigitalOcean Droplets provides a consistent and version-controlled way to handle cloud infrastructure. This approach makes it easy to replicate environments and manage resources at scale.
Remember to always review the changes before applying them and maintain backups of your important data. For production environments, consider adding additional security measures and monitoring solutions.


