How to Set Up Azure VNet Peering: A Comprehensive Network Connectivity Guide
What is VNet Peering?
VNet Peering is a powerful networking feature in Azure that allows you to connect multiple Virtual Networks seamlessly. It enables resources in different VNets to communicate as if they were on the same network.
Azure supports the following types of peering:
- Virtual network peering: Connect virtual networks within the same Azure region.
- Global virtual network peering: Connect virtual networks across Azure regions.
Virtual network peering creates a private, secure communication channel within Microsoft’s network infrastructure. By leveraging the Microsoft backbone network, these virtual networks can seamlessly exchange data without exposing traffic to public internet pathways or needing complex gateway configurations.
Benefits of VNet Peering
- Reduced network latency
- Enhanced security
- Cost-effective network connectivity
- Simplified cross-network communication
- Improved resource sharing
Prerequisites
Before starting VNet Peering:
- Active Azure subscription
- Two or more existing Virtual Networks (here you can follow our blog post for Azure Vnet creation How to Create a Virtual Network (VNet) in Azure?)
- Sufficient permissions to configure network settings
- Basic understanding of Azure networking
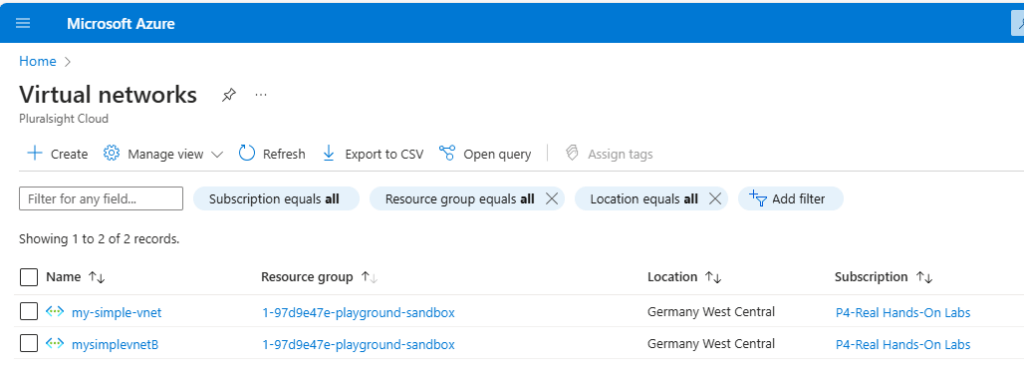
I have created two sample Azure Vnets in the same region with non-overlapping IP space and in the same Azure subscription (it can be different region, subscription even tenant)
Step-by-Step VNet Peering Setup
Step 1: Verify VNet Compatibility
- Ensure VNets are in the same or different Azure regions
- Check for non-overlapping IP address spaces
- Confirm you have necessary access rights
Step 2: Access Azure Portal
- Log in to Azure Portal
- Navigate to the first Virtual Network
- Select “Peerings” in the settings menu
Step 3: Create Peering Connection
- Click “+ Add” to create a new peering
- Provide a peering name
- Select the target VNet
- Configure peering settings
Step 4: Configure Peering Options
- Choose network access settings
- Enable/disable forwarded traffic
- Set gateway transit preferences
- Configure remote gateway options
Step 5: Validate and Create
- Review all configurations
- Click “Add” to create peering (Azure will create peering in both side)
I have created 2 Linux virtual machine for testing associated with each Vnet.
This is the Linux B machine in simplevnetB, got IP address 10.10.0.4
This is the Linux A machine in simple-vnet, got IP address 10.0.0.4
Both of the Linux machines in Azure are in different network(Vnet) but they can reach each other via Azure Vnet Peering, Here i am doing connectivity test with ping from Linux-A to Linux-B.
Advanced Peering Configurations
Global VNet Peering
- Connect VNets across different Azure regions
- Supports cross-region networking
- Slightly higher data transfer costs
Peering with Different Subscriptions
- Require cross-subscription permissions
- Use Azure Role-Based Access Control (RBAC)
- Confirm network contributor roles
Best Practices
- Use non-overlapping IP address ranges
- Implement network security groups
- Regularly audit peering connections
- Document network topology
- Monitor network performance
Potential Challenges and Solutions
- IP Space Conflicts
- Plan address spaces carefully
- Use address translation if needed
- Security Considerations
- Implement strict NSG rules
- Use service endpoints
- Configure network security policies
Troubleshooting VNet Peering
- Verify network permissions
- Check network security group configurations
- Ensure correct routing settings
- Use Azure Network Watcher
FAQ Section
Q1: Is VNet Peering free?
Inbound and outbound traffic within the same region is free. Cross-region peering incurs data transfer charges.
Q2: How many VNets can I peer?
Azure allows up to 500 VNet peering connections per VNet.
Q3: Can I peer VNets in different subscriptions?
Yes, you can peer VNets across different subscriptions and even Azure Active Directory tenants.
Q4: Does VNet Peering support transitive routing?
No, VNet Peering does not support transitive routing by default. You have to exclusively select in the Vnet Options.
Q5: How do I secure VNet Peering?
Use network security groups, implement strict access controls, and regularly audit connections.
Conclusion
VNet Peering offers a flexible and powerful way to connect Azure networks. By following this guide, you can create robust, secure network infrastructures.
Ready to optimize your Azure networking? Start implementing VNet Peering today!
